
Most new traders spend all their energy on one question: where do I get in? They stare at charts hunting for the perfect moment to buy. And that matters — but here's the secret almost nobody tells a beginner: deciding where you get OUT is at least as important as deciding where you get in. Maybe more.
Think about it like a road trip. Getting in your car is easy. Knowing your destination is what actually gets you somewhere. A trader who buys without knowing where they'll sell is a driver who pulls out of the driveway with no address in mind. They just drive around until they're scared or tired, then stop wherever they happen to be. That's not a plan. That's wandering.
This guide is about the destination — your target (also called a profit target: the price where you plan to sell and lock in your gain). We'll build the whole idea from the ground up. By the end, you'll understand R-multiples, how to take profit, what "scaling out" means, and why professionals obsess over the exit. And you'll be able to use every bit of it on Monday.
No jargon goes undefined. No step gets skipped. Let's go.
What a "Target" Actually Is (In Plain English)
A target is simply the price where you've decided, in advance, that you'll sell to take your profit. That's it. It's the finish line you draw before the race starts.
Let's define a few words we'll use constantly, because you can't set a target without them:
- Entry — the price where you buy (or, in a short trade, sell first). It's where the trade begins.
- Stop-loss (or just stop) — the price where you'll sell at a loss to protect yourself if the trade goes against you. It's your emergency exit. Your seatbelt. We have a whole beginner guide on stops, but for now just know: a real trade always has one.
- Target — the price where you'll sell at a profit if the trade goes your way. The happy exit.
So every complete trade has three prices decided before you click buy:
- Where you get in (entry)
- Where you bail if you're wrong (stop)
- Where you cash in if you're right (target)
A trade without all three is not a trade. It's a hope. Hope is not a strategy. At Hollow Point Trading, the first thing we teach is that discipline beats prediction — and a target is discipline made visible. It's you deciding, while you're calm and thinking clearly, what "winning" looks like, so that later — when your heart is pounding and the price is jumping around — you don't have to make that decision in the heat of the moment. You already made it.
That is the whole point. You set the target when you're calm so you don't have to guess when you're emotional.
Why a Beginner Should Care More About the Exit Than the Entry
Here's a hard truth that will save you a lot of money: a good entry with a bad exit is a losing strategy.
You can pick the perfect spot to buy, watch the price rip up in your favor, feel like a genius — and still lose money, if you don't have a plan to get out. Why? Because without a target, most beginners do one of two things:
Mistake number one: they sell too early. The price ticks up a little, they get nervous, they grab a tiny profit "just to be safe," and then watch the trade go on to make ten times what they collected. Death by a thousand tiny wins that never cover the losses.
Mistake number two: they sell too late — or never. The price goes up, they get greedy, they think "just a little more," the trade reverses, their gain evaporates, and now they're hoping it comes back while it sinks into a loss. A winner turns into a loser because there was no line in the sand.
A target fixes both problems. It gives you a specific, pre-decided place to say "this is enough, I'm taking it." No nerves. No greed. Just the plan you made when your head was clear.
There's a second reason beginners especially need this. When you're new, your emotions are at their loudest. You haven't done this a thousand times, so every wiggle feels huge. The trader next to you who's seen it all can ride out a scary dip. You can't yet — and that's fine. A written target and stop are training wheels for your emotions. They let you trade like a calm professional before you've built the calm.
Protecting your money — what we call protecting capital — comes first, always. And you can't protect what you haven't decided to protect. The target and the stop are how you decide.
The One Idea That Makes Everything Click: The R-Multiple
Here's the single most valuable concept in this entire guide. If you remember nothing else, remember R.
R stands for Risk. Specifically, R is the amount of money you're risking on a single trade — the distance from your entry to your stop, measured in dollars.
Let's make it concrete. Say you buy a stock at $100. You decide that if it drops to $95, you were wrong and you'll get out. That $5 difference — the distance from entry to stop — is your risk per share. If you bought 100 shares, your total risk is $5 × 100 = $500.
That $500 is your 1R. One unit of risk. Your "R."
Now here's the beautiful part. Once you know what 1R is, you can measure your reward in the same units:
- If the trade makes you $500, that's +1R. You made back exactly what you risked.
- If it makes you $1,000, that's +2R. Twice your risk.
- If it makes you $1,500, that's +3R. Three times your risk.
- If it hits your stop and you lose the $500, that's −1R. One full unit of risk, gone.
Do you see what just happened? We stopped talking about the trade in dollars and started talking about it in R-multiples — multiples of the risk. This is how professionals think about every trade. Not "I made $437," but "I made +2.3R."
Why does this matter so much for a beginner?
Because R lets you compare every trade on the same scale, no matter the price of the thing you're trading. A $10 stock and a $2,000 stock and a futures contract are all totally different in dollar terms — but in R terms, a +2R trade is a +2R trade. R is the universal language of the exit.
And crucially: R is how you set your target. You don't pick a target out of thin air. You pick it as a multiple of your risk. "My stop is 1R below my entry, so my target will be 3R above it." Now your exit is anchored to something real — the amount you're willing to lose — instead of a random number that "feels right."
The Hollow Point Rule: 1:3 Reward-to-Risk
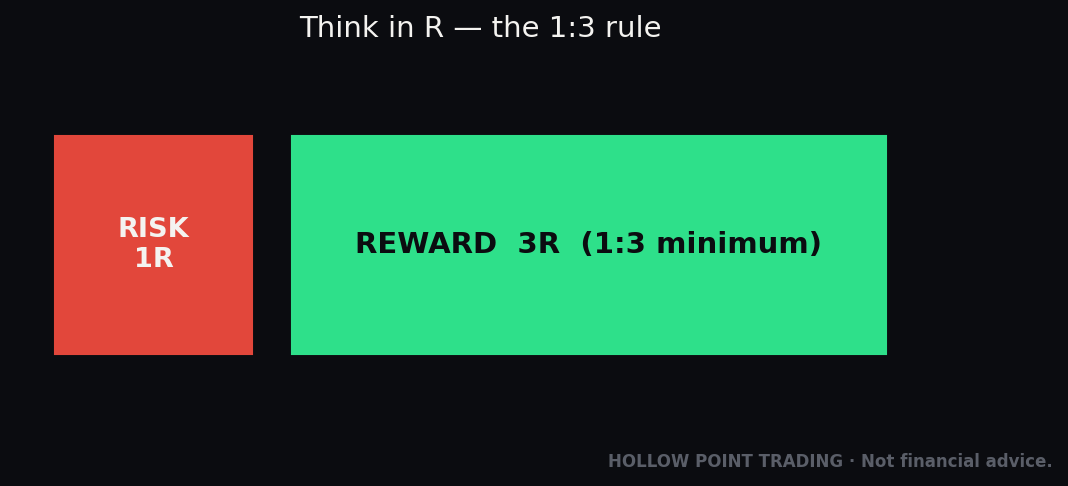
This brings us to a number you'll hear us repeat until you're sick of it: 1:3. One to three. It's the reward-to-risk ratio we build around, and it's one of the most important habits a beginner can form.
Reward-to-risk (sometimes written risk-to-reward, or R/R) compares how much you stand to gain against how much you stand to lose. A 1:3 ratio means: for every 1R you risk, you're aiming to make 3R. Your target sits three times as far from your entry as your stop does.
Back to our example. You bought at $100 with a stop at $95, risking $5 per share (1R).
- Your stop is $5 below entry (that's your 1R of risk).
- For a 1:3 trade, your target is $15 above entry — three times the risk.
- $100 + $15 = $115 target.
So: buy at $100, stop at $95, target at $115. Risk $5 to make $15. That's 1:3.
Now — why does this ratio matter so enormously? Because it means you don't have to be right very often to make money. This is the part that blows beginners' minds, so let's prove it with real numbers.
Imagine you take 10 trades. Each one risks 1R and aims for 3R. Now imagine you're wrong more often than you're right — you only win 4 out of 10:
- 4 winners × +3R each = +12R
- 6 losers × −1R each = −6R
- Net result: +6R
You lost 60% of your trades — you were wrong the majority of the time — and you still came out well ahead. Six units of risk in profit. That's the power of a good reward-to-risk ratio: it does the heavy lifting so you don't have to be a fortune-teller.
Compare that to a beginner chasing 1:1 trades (risk $5 to make $5), winning the same 4 out of 10:
- 4 winners × +1R = +4R
- 6 losers × −1R = −6R
- Net result: −2R. A loss.
Same win rate. Completely different outcome. The difference is entirely in the exit. This is why we say the exit is half the trade — often more than half. Your entry determines whether you win. Your target determines whether winning is worth it.
This is also the mathematical backbone of "discipline over prediction." You don't need to predict the future. You need a structure where being right pays much more than being wrong costs. Set that up, follow it, and time does the rest.
How to Set a Target, Step by Step
Let's turn all of this into a repeatable recipe you can run on every single trade. Five steps. Same every time.
Step 1: Find your entry
Decide where you're getting in. Maybe it's a price breaking above a level you've been watching, or bouncing off a support zone. The how of picking entries is a separate guide — for now, just say your entry is $50.
Step 2: Find your stop — this comes BEFORE the target
This surprises beginners: you set your stop before your target. Why? Because your stop defines your risk (your 1R), and everything else is measured from it.
Your stop should sit at a price that means "if we get here, my reason for the trade was wrong." Often that's just below a support level, a recent low, or a spot the price shouldn't reach if you're right. Say you place your stop at $48.
- Risk per share = $50 − $48 = $2. That's your 1R.
Step 3: Measure your target in R
Multiply your risk by your target ratio. Using the HPT 1:3:
- 3 × $2 = $6 of reward.
- Target = $50 + $6 = $56.
Step 4: Sanity-check the target against the real chart
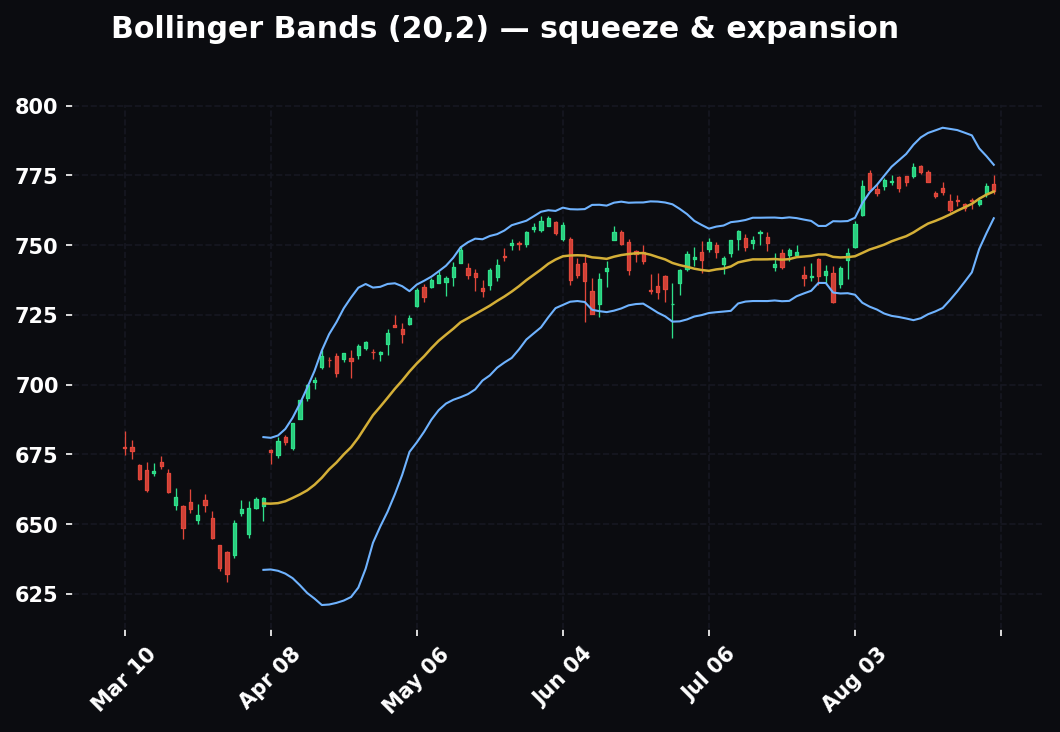
Here's where you become an analyst instead of a calculator. A target isn't just math — it has to make sense on the chart. Ask: is there a logical reason the price could actually reach $56? Or is there a wall in the way?
If there's a strong resistance level (a price ceiling where the stock has repeatedly stopped and turned down before) at, say, $54 — then $56 might be asking too much. The price may stall at $54 and never reach your target. In that case you have two honest choices:
- Lower the target to just under the wall (say $53.80) and accept a smaller ratio — but only if it's still worth taking. If lowering it drops you below roughly 1:2, many disciplined traders would pass on the trade entirely.
- Skip the trade. No shame in it. The best traders pass far more than they take.
This is the difference between a target you calculated and a target you can defend. Both the math and the chart have to agree.
Step 5: Write it down, then don't touch it
Record all three numbers before you enter: Entry $50, Stop $48, Target $56. Say it out loud. Put it in a notes app. The act of committing it in advance is what stops you from improvising later. Once you're in the trade, your job is to follow the plan, not rewrite it because you got scared or greedy.
There's one honorable exception, and we'll cover it next: moving your stop UP to protect profit. Never move it down. Never widen your loss. That's the cardinal sin.
A Fully Worked Beginner Example (Start to Finish)
Let's walk through one complete, realistic trade so you can see every piece working together. We'll keep the numbers friendly.
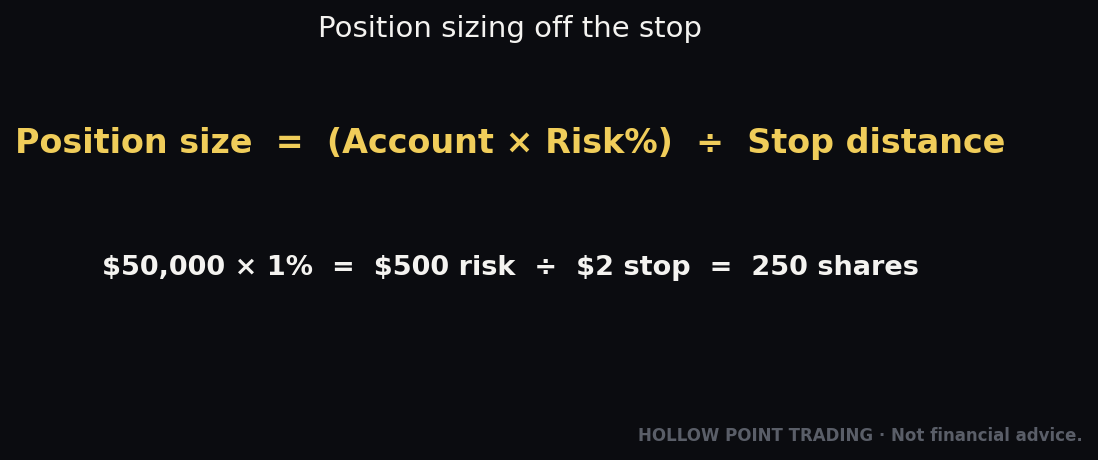
Meet our beginner, Sam. Sam has a $5,000 account and has decided — wisely — to risk no more than 1% of the account per trade. One percent of $5,000 is $50. So Sam's 1R, in dollars, is $50. Sam will never lose more than $50 on a single trade if the plan is followed. (This idea — risking a small, fixed percentage — is called position sizing, and it's what keeps one bad trade from blowing up the whole account.)
Sam is watching a stock called XYZ, currently trading around $20.00. Here's the plan Sam builds:
Entry: Sam wants to buy at $20.00 as the price pushes up through a level it's been stuck under.
Stop: Just below a recent low sits $19.50. If XYZ falls back there, the breakout failed. Stop = $19.50. Risk per share = $20.00 − $19.50 = $0.50.
Position size: Sam risks $50 total, and $0.50 per share. So Sam can buy $50 ÷ $0.50 = 100 shares. (This is how the stop distance decides how many shares you buy — tighter stop, more shares; wider stop, fewer. The dollar risk stays fixed at $50.)
Target: Using 1:3, reward = 3 × $0.50 = $1.50 per share. Target = $20.00 + $1.50 = $21.50.
Chart check: Sam looks up and sees the next resistance sits at $22.00 — comfortably above the $21.50 target. Good. There's room for the price to reach the target before hitting a wall. The trade is valid.
So Sam's written plan is:
Buy 100 XYZ at $20.00. Stop $19.50 (−$50). Target $21.50 (+$150). Reward-to-risk 1:3.
Now the trade plays out. XYZ climbs. It touches $21.50. Sam's target is hit, Sam sells all 100 shares, and the profit is 100 × $1.50 = +$150. In R terms: +3R. One clean, planned, unemotional win.
Notice what Sam did not do. Sam didn't panic-sell at $20.30 for a tiny gain. Sam didn't get greedy at $21.50 and hold "for more," only to watch it fall. Sam followed the plan. The plan made the decision. That is exactly what a target is for.
And if XYZ had gone the other way and hit $19.50? Sam loses $50 — 1R — and moves on, completely fine, because that loss was decided and accepted before the trade ever started. A planned loss is not a failure. It's a cost of doing business. Losing traders take unplanned losses. Winning traders take planned ones.
Scaling Out: You Don't Have to Sell It All at Once
Everything so far assumed you sell your entire position at one target price. That's the simplest way, and there's nothing wrong with it — beginners should master the all-in, all-out method first.
But there's a popular next-level tool worth understanding: scaling out, sometimes called taking partial profits. It means selling your position in pieces at different targets, instead of all at once.
Here's the idea. Instead of one target, you set two or three. As the price climbs, you sell a chunk at each one. Let's redo Sam's trade with scaling out. Sam has 100 shares, entry $20.00, stop $19.50 (1R = $0.50). Sam sets three targets:
- Target 1 at $20.50 (+1R): sell 33 shares.
- Target 2 at $21.00 (+2R): sell 33 shares.
- Target 3 at $21.50 (+3R): sell the last 34 shares.
Why would anyone do this instead of just selling everything at $21.50? Three real benefits:
1. You lock in some profit early.* The moment Target 1 hits, you've banked real money. Even if the price reverses hard right after, you're not walking away empty-handed. This soothes the beginner's biggest fear — watching a gain disappear — which makes it far easier to let the rest of the trade breathe.
2. You reduce risk as you go. After you've sold part and taken profit, the money left "at risk" is smaller. You're playing with a cushion.
3. You still catch the big moves. By keeping a final piece running to the farthest target, you don't cap your upside. If XYZ rockets, that last chunk rides along.
There's one powerful move that pairs perfectly with scaling out: moving your stop to breakeven. Once Target 1 hits and you've taken some profit, you slide your stop-loss up from $19.50 to your entry price, $20.00. Now, in the worst case, the shares you're still holding can't lose money — if the price falls back to $20.00, you're out at zero on those, but you already banked the profit from Target 1. This is called a "risk-free trade" (a slightly loose term — you already took your risk to get here — but it captures the feeling: from this point, you can only win or break even).
This is the professional's version of "protect capital first." You take the trade, and the moment it proves you right, you systematically remove your downside. Discipline, made mechanical.
A word of caution for beginners: scaling out is a great tool, but don't start here. It adds decisions, and more decisions mean more chances to fumble. Learn to nail a single target and a single stop first. Once that's automatic — once you can take a full-position win or loss without flinching — then add scaling out. Walk before you run.
The Beginner Mistakes to Avoid
Let's name the traps directly, so you can see them coming.
Mistake 1: No target at all. Buying with only a vague "I'll sell when it goes up." This is the original sin. Without a target you will sell on emotion every time. Always set the number first.
Mistake 2: Moving your target up mid-trade out of greed.* The price approaches your $56 target and you think, "you know what, I bet it goes to $60." So you cancel your target and hold. Now you've thrown away your plan and you're gambling. Sometimes it works, which is the worst thing that can happen — because it teaches you a bad habit that will eventually cost you everything. Hit your target, take your win.
Mistake 3: Moving your stop down to avoid a loss. The mirror image, and even more dangerous. The price falls toward your $48 stop, and instead of accepting the planned loss you move the stop to $46 "to give it room." You just doubled your risk and abandoned the whole point of the stop. Never widen a loss. Ever.* Stops move up to protect profit, never down to postpone pain.
Mistake 4: Setting targets with math but ignoring the chart. A 1:3 target that sits right on top of a massive resistance wall is a fantasy. The math says $56; the chart says the price has turned down from $54 five times. Believe the chart. Adjust or skip.
Mistake 5: Targets so far away they never get hit. A beginner discovers 1:5 or 1:10 ratios and thinks, "why not aim huge?" Because the farther the target, the less often price reaches it. There's a sweet spot. 1:3 is a proven, achievable balance — ambitious enough to make the math work, realistic enough to actually happen. Start there.
Mistake 6: Selling everything at the first flicker of green. The panic-sell. You're up $12 and you grab it because you're afraid it'll turn. Do this repeatedly and your tiny wins will never outweigh your full-size losses. Trust the target you set.
Mistake 7: No stop, only a target. Some beginners set a target but skip the stop "because I don't plan on losing." Everyone plans on winning. The stop is for when the plan is wrong — which will be often. A target without a stop is a seatbelt you left unbuckled.
Mistake 8: Changing the plan while the trade is live. The single unifying rule behind most of these: once you're in, the plan is locked. The only permitted change is trailing your stop up to protect gains. Everything else was decided in advance, on purpose, by the calm version of you. Let that person be in charge.
Your Target-Setting Cheat-Sheet
Tape this to your monitor. Run it on every trade, in this order, no exceptions.
Before you enter — set all three numbers:
- Entry — where am I buying? → _______
- Stop — where am I wrong? (just past a level) → _______
- 1R — entry minus stop = my risk per share → _______
- Target — entry + (3 × 1R) for a 1:3 trade → _______
- Chart check — is there room to the target before a wall? If no → lower it or skip.
- Size — (dollars I'll risk) ÷ (1R per share) = how many shares → _______
- Write it down. Entry / Stop / Target, in ink.
While the trade is live:
- Hit target? → Sell. Take the win. No second-guessing.
- Hit stop? → Sell. Take the −1R. No hoping.
- Want to move the stop? → Only UP, only to protect profit. Never down.
- Want to move the target? → Don't.
The numbers to memorize:
- 1R = your risk = entry to stop.
- Target = 3R away for the HPT 1:3 standard.
- Win rate needed to profit at 1:3 = just 26%+ to break even; 40% is very healthy.
- Risk per trade = 1% of your account, max, while you're learning.
The one-sentence version: Decide where you'll take the profit and where you'll take the loss before you ever click buy — and then do exactly what you decided.
How This Fits the Bigger Hollow Point Picture
Setting a target isn't a standalone trick. It's one gear in a whole machine, and it's worth seeing where it sits.
At Hollow Point Trading, we think top-down: macro, then sector, then stock. That means we start with the big picture — the overall market and economy (macro) — then narrow to the industry group that's strong or weak (sector), and only then pick the individual stock. That funnel decides what to trade and which direction. But once you've found your candidate, the target and stop decide whether the trade is even worth taking and how you'll manage it. The best stock in the strongest sector is still a bad trade if there's no room to a sensible target. The exit plan is the final gate.
It also plugs directly into our two deepest values:
Discipline over prediction. We already proved it with the numbers: at 1:3, you can be wrong most of the time and still win. That's a profound relief. It means you can stop trying to be a psychic and start being a professional — someone who follows a repeatable process where the math is on their side. The target is where that math lives. Every time you honor a target instead of an emotion, you're voting for discipline.
Protect capital first. A target is one half of your defense; the stop is the other. Together they define, in advance, the exact worst case and the exact best case of every trade. You never step into the unknown. You never risk more than a sliver. You survive the losing streaks that wash out undisciplined traders — and survival is the whole game, because a trader who's still in the seat next year is a trader who can compound. The ones who blow up chasing giant, planless wins are never heard from again.
So when you set a target, understand what you're really doing. You're not just picking a price to sell. You're installing the discipline that lets you lose small, win bigger, and stay in the game long enough for the math to make you money. You're deciding your destination before you pull out of the driveway.
The entry gets all the attention. The exit gets all the results. Now you know the difference — and you can put it to work Monday morning.
Bound by rules, feared by trade.